Image generatorUpdated Oct 20, 2026

Halloween AI Photo Editor

A good Halloween photo does not always need a costume. Sometimes it needs better light, a different background and makeup that reads clearly on camera. This editor is for the photo you already took and almost like, but want to push further.

  • Browse without signing up
  • Credit costs are shown before you generate
  • Works on desktop and mobile
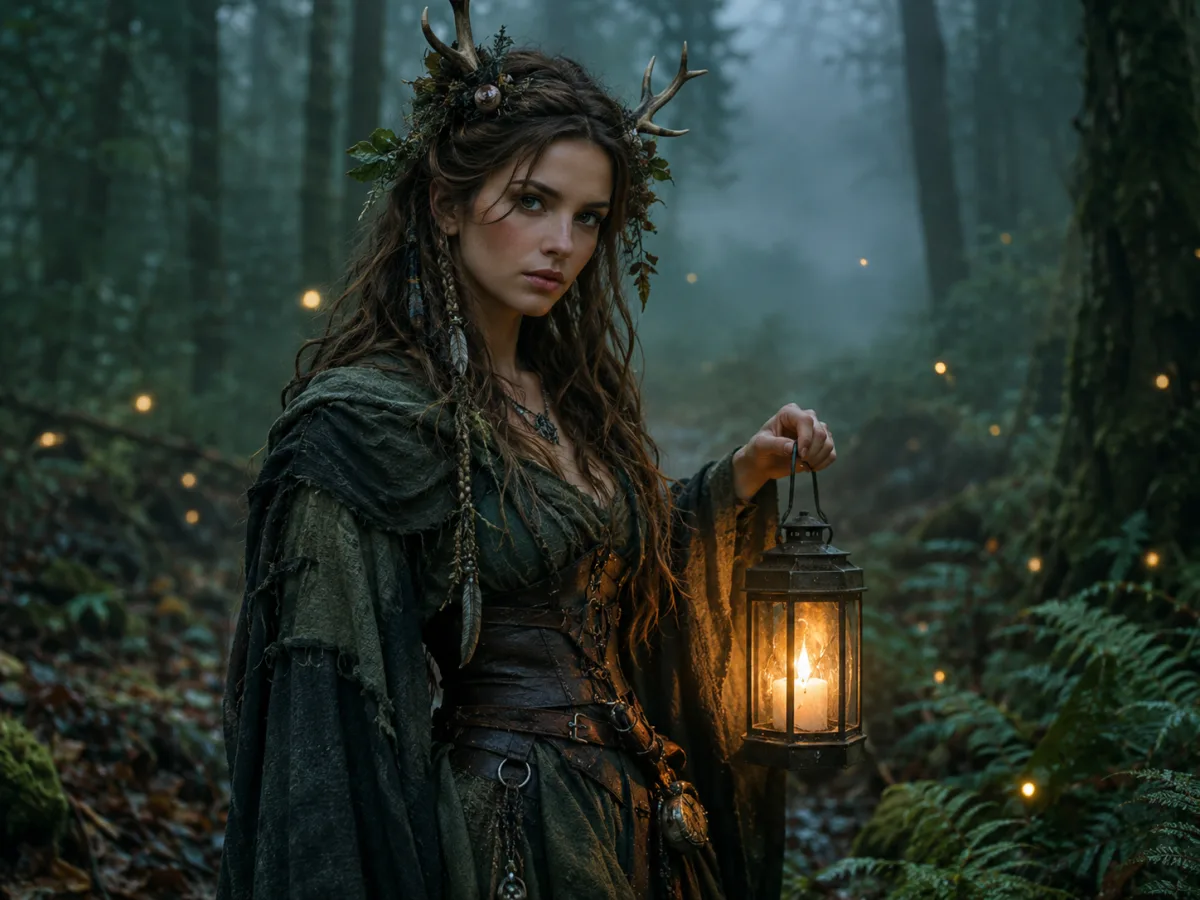
Halloween photo edit of a forest witch portrait with layered green robes, a lantern and misty woodland light
Forest Witch · Image generator

Quick answer

A Halloween AI photo editor changes only the parts of a photo you choose: outfit, makeup, lighting and background. Unlike a costume generator, it is built for editing an existing portrait, so you can keep the pose and expression you already like and restyle the scene around them.

Written and tested by the Text to PSD product teamStandard image: 8 credits · Browser tools are free

Every example on this page was generated with GPT Image 2 using the same look described in the prompt. Example images are not customer photos.

Looks you can generate

The prompts below are written as editing instructions: what to preserve, what to replace, what lighting to use and what to avoid. That structure is why the results usually keep the person recognizable instead of turning them into a different face.

Forest witch Halloween portrait with moss green robes and a lantern in a misty autumn forest

Forest Witch

Moss-green robes, weathered leather and a single warm lantern in a damp autumn forest. A moody, grounded look for a portrait you already like.

Prompt recipe

Copy this prompt, open the workspace, upload your photo, and paste it into the prompt field.

Use the uploaded portrait as the identity and pose reference. Keep the person's face, skin tone, age and expression clearly recognizable. Restyle the scene into an original forest witch Halloween editorial: layered charcoal and moss-green robes, a weathered leather corset, small antler-and-branch details in the hair, and a single warm lantern as the key light. Surround the subject with a damp autumn forest at dusk, low mist, ferns and soft firefly bokeh. Use photorealistic photography, natural skin texture, realistic fabric wear and cinematic teal-green grading. Keep the same number of people. Avoid changing the face, adding extra fingers, distorted hands, text or watermarks.
Try this look
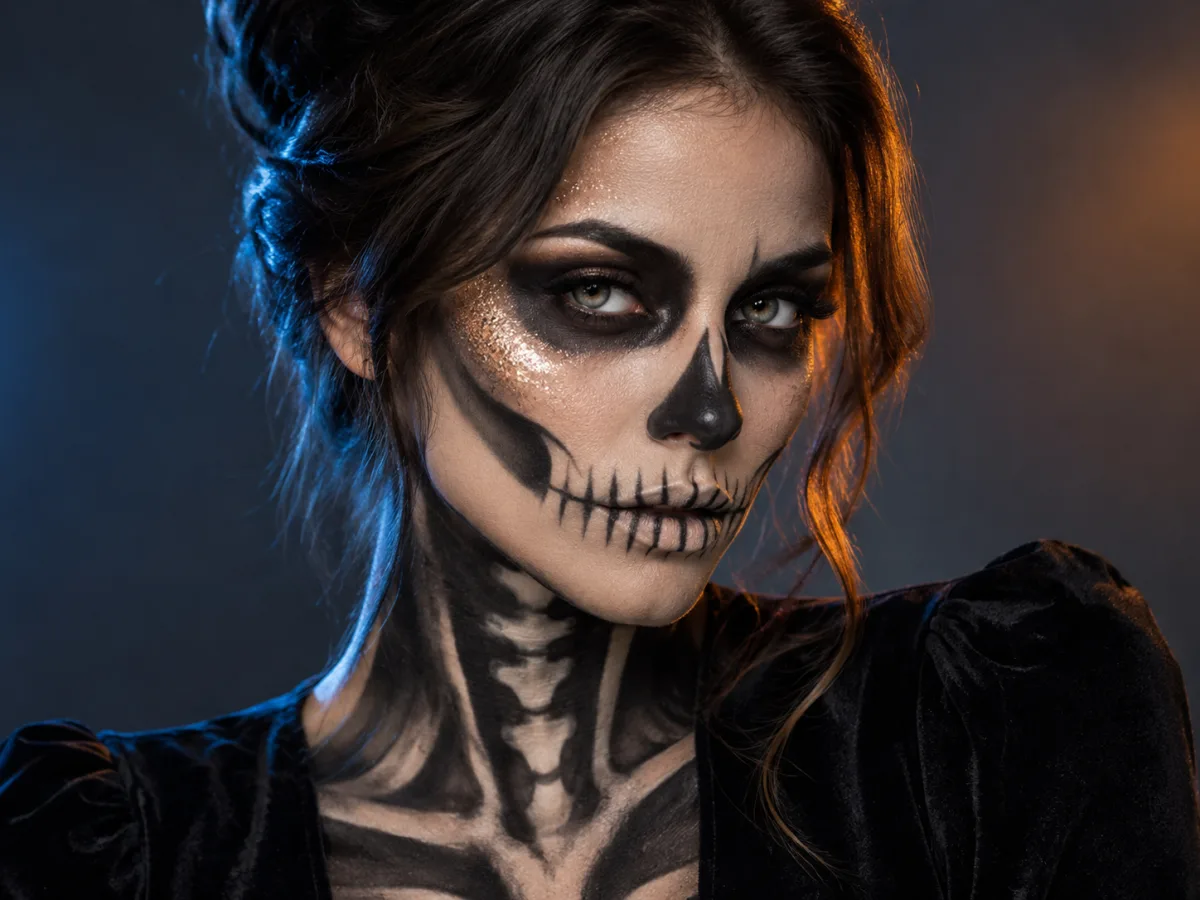
Skeleton makeup Halloween beauty portrait with black and ivory face paint and studio rim lighting

Skeleton Makeup

Precise black-and-ivory skeleton makeup with a clean studio background and blue-amber rim light. Elegant rather than gory.

Prompt recipe

Copy this prompt, open the workspace, upload your photo, and paste it into the prompt field.

Edit the uploaded photo into a high-end Halloween beauty portrait with skeleton-inspired makeup. Preserve the subject's recognizable facial structure, skin tone and eye color. Paint precise black-and-ivory skeleton makeup over the face and neck, keeping it elegant and editorial rather than gory. Add subtle glitter on the cheekbones and a dark velvet outfit. Use a clean studio background with soft blue and amber rim lights, a shallow depth of field and razor-sharp focus on the eyes. Keep the result photorealistic with visible skin texture and realistic makeup edges. Keep the same number of people. Avoid changing identity, extra limbs, text and watermarks.
Try this look

How it works

  1. Step 1

    Start with an existing portrait

    Use a photo with a clear face and a pose you want to keep. The editor changes the scene around the person, not the other way around.

  2. Step 2

    Choose an edit direction

    Pick Forest Witch or Skeleton Makeup, or edit the prompt to change the makeup intensity, outfit color or background time of day.

  3. Step 3

    Keep, compare, refine

    Save the first result, then change one variable. A second pass with a smaller change usually beats a completely new prompt.

What you can change in a Halloween photo

The four levers that matter most are outfit, makeup, background and lighting. Outfit and makeup carry the Halloween read. Background and lighting decide whether the image looks like a snapshot or an editorial frame.

You can also change the camera language: a tighter portrait crop, a wider environmental shot, a shallow depth of field or a harder flash look. Adding one camera instruction is often enough to make the result feel intentional.

  • Swap a casual outfit for a costume silhouette
  • Add skeleton, witch or glam-horror makeup
  • Replace a bedroom background with a forest, corridor or studio
  • Change daylight to lantern light, moonlight or colored rim light

Makeup that still looks like you

The face is the part most likely to drift. A prompt that says preserve facial identity, skin tone and eye color, then describes the makeup as a layer on top, gives the model a clear boundary. Avoid prompts that ask for a new face or a different age.

If the makeup is too heavy, do not rewrite the whole prompt. Add one line: keep the skin texture visible and the makeup edges realistic. That single constraint usually fixes the plastic look.

Background and lighting do most of the work

A plain wall can become a foggy forest, an abandoned corridor or a warm studio. The trick is to describe the light in the new scene, not only the objects. Fog alone looks flat; fog plus a warm lantern and a cool moon fill gives the image depth.

Keep the light direction consistent with the original photo when you can. If the original has soft light from the left, ask for soft light from the left in the new scene. That small consistency makes the composite feel believable.

When to animate the result

If the still image already works, a five-second animation can make it feel like a short film. A head turn, drifting fog and a slow push-in are usually enough. The Halloween AI video generator page has prompts built for that next step.

Do not animate a result you are not happy with. Fix the still first; motion amplifies both the good and the bad parts of an image.

Who it is for

  • Rescuing a good photo with a boring background
  • Testing Halloween makeup before buying products
  • Making a darker, more editorial profile photo
  • Creating a matched set of portraits for a group chat

Frequently asked questions

Can I edit a photo I did not take?

Only if you have permission from the person in the photo and the rights to use it. Do not edit or publish images of other people without consent, and do not use the tool to impersonate anyone.

Will the editor change my face?

The prompts are written to preserve your face, skin tone and proportions. Some drift is possible, especially with heavy makeup prompts. Use a clear source photo and keep the identity-preservation sentence in the prompt.

Can I remove the background instead of replacing it?

This page focuses on restyling the background. For a clean cutout, use the free Transparent PNG Maker, which runs in your browser and does not upload the image.

What photo works best?

A sharp, evenly lit photo with one person and a visible face. Avoid sunglasses, heavy beauty filters and strong shadows across the eyes. A plain background is easier to replace.

Can I make the result look less AI?

Ask for realistic skin texture, natural shadows and a specific camera style such as 85mm portrait photography. Avoid words like perfect, smooth or plastic. Keep the makeup edges slightly imperfect.

Do I need a subscription?

No. You can browse the public pages and copy a prompt first. Hosted generations use credits, and current packs and prices are listed on the Pricing page.

Use a photo of yourself or one you have permission to use. Do not upload images of other people without consent.

Turn the photo you almost like into the one you post

Keep the pose, change the scene. Start with one portrait and one edit direction.